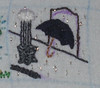
I do love a bit of satin stitch me- here is a little buggy satin stitch sampler with an explanation of how I do 3 different types of satin stitch
 1) To start with you need a pattern, so get designing, or you can use my one! download the pdf for free.
We are starting with the bug on the left, he is just plain ol' simple satin stitch
.JPG)
.JPG) 2)Bring your needle up at the bottom of your shape in the middle and form a stitch by taking your needle through at the top of the shape. Make another stitch in the same way next to it and work across the shape like this until you have filled one side, then go back to the middle and fill in the other side
2)Bring your needle up at the bottom of your shape in the middle and form a stitch by taking your needle through at the top of the shape. Make another stitch in the same way next to it and work across the shape like this until you have filled one side, then go back to the middle and fill in the other side
 If I am filling a larger shape I might outline it with split stitch first and take my satin stitches up through/down into the split stitch line this gives a smooth outline but isn't really necessary on such a small shape
3) Fill in the top of the bugs body the same way
.JPG) 4) Use your new-found satin stitching skills to fill in the bugs head in a different colour and use small straight stitches to add detail.
4) Use your new-found satin stitching skills to fill in the bugs head in a different colour and use small straight stitches to add detail.
Make 2 long chain stitches to form each leg with a small straight stitch at the end to secure. You might find it easier to mark them on with a disappearing marker first.
Work the top two legs first, then the middle two, then the bottom two, DON'T try and do all the legs on the left then all the legs on the right- it will be wonky!
Ta-dah- he's done! (You could add some french knot spots or seed bead eyes if you wanted to be fancy)
.JPG) 5) Now for the middle bug- he is stitch-padded satin stitch. Start by satin stitching a small area in the middle of the bug
5) Now for the middle bug- he is stitch-padded satin stitch. Start by satin stitching a small area in the middle of the bug
.JPG) 6) Now stitch right over the top of those stitches, covering a slightly bigger area ...
6) Now stitch right over the top of those stitches, covering a slightly bigger area ...
 7) ... and again... and again- until your shape is filled. The body should stick up from your fabric quite a bit because of the padding you made with your stitches.
Add a satin stitched head and work the legs using a couple of long chain stitches and 3 tiny chain stitches (see the first photo) and take one stitch across the body near the top in your contrasting colour to define the body.


 10) Work your satin stitches over the top of the felt- this little guy should have a really domed body because of the felt padding.
An alternative way of doing this is to just use the larger piece of felt over some toy stuffing- you can make the shape really padded this way.
This little guy has a satin stitched head and chunky legs worked in stem stitch and filled with yet more satin stitch. His body is defined with a line of back stitch. Use the first photo as a guide.
There we have it- three types of satin stitch- I hope someone out there finds this useful, please let me know if you do. If there is anything that doesn't make sense (and as this is my first tutorial this is very likely) just ask and I will try and explain.

We are starting with the bug on the left, he is just plain ol' simple satin stitch
.JPG)
.JPG)

3) Fill in the top of the bugs body the same way
.JPG)
Make 2 long chain stitches to form each leg with a small straight stitch at the end to secure. You might find it easier to mark them on with a disappearing marker first.
Work the top two legs first, then the middle two, then the bottom two, DON'T try and do all the legs on the left then all the legs on the right- it will be wonky!
Ta-dah- he's done! (You could add some french knot spots or seed bead eyes if you wanted to be fancy)
.JPG)
.JPG)

Add a satin stitched head and work the legs using a couple of long chain stitches and 3 tiny chain stitches (see the first photo) and take one stitch across the body near the top in your contrasting colour to define the body.

8) The last little bug is felt padded satin stitch. Cut out a small piece of felt in a similar colour to the thread you are using and use little stitches to attach it to the middle of the bugs body

9)Now cut out a slightly bigger piece of felt and attach it over the top

An alternative way of doing this is to just use the larger piece of felt over some toy stuffing- you can make the shape really padded this way.
This little guy has a satin stitched head and chunky legs worked in stem stitch and filled with yet more satin stitch. His body is defined with a line of back stitch. Use the first photo as a guide.
There we have it- three types of satin stitch- I hope someone out there finds this useful, please let me know if you do. If there is anything that doesn't make sense (and as this is my first tutorial this is very likely) just ask and I will try and explain.


.jpg)


.jpg)